Testing your App Store Icon – Why You May Not Want the Best Looking Icon

App Store Icons


We’ve all heard the importance of having a great app icon, so your app can stand out. Why is this important, and what  makes an icon great though?

The importance is twofold.

First, you want an icon that encourages a user to download your app in the first place. In a sea of icons, first impressions make a big difference. The quality of your icon suggests the quality of detail in your app.

Second, this is the icon that users will be using to launch your app each time. If it stands out in the phone, the user is more likely to click it and keep using your app.

Here are the standard tips, that most people follow. This is a good list to begin from.

  1. It should stand out from the crowd. When users are looking through pages of icons, yours should be the one that stands out and gets noticed. Of course, most other icons are also trying to stand out as well, so at the very least, don’t be the one dull and boring looking one.
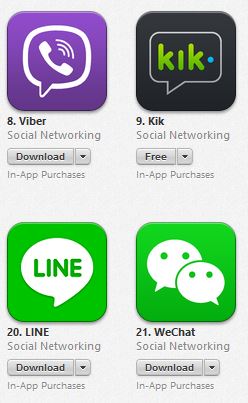
  2. It gives an idea of what the app is about. The name of your app will be under the icon, but the image you use should still refer to what your app is about. Many camera apps for example use a lens picture. Messaging apps use a green speech bubble. This allows potential users to instantly identify the category that your app is in.
  3. It doesn’t blend in with competing apps. While it helps to make the category your app is in obvious, you don’t want it so obvious that your app blends in with other competing apps. See what you can do to differentiate the look from others.
  4. It matches the design of your app. As this is the icon users will be clicking to launch your app, you want its design and style to match the design theme of your app.

MessagingAppIcons

The problem with this list though is that even if you have a beautiful looking app icon that conveys the exact message you want, it might not convert as well as you want (i.e. it might still not encourage users to download your app over the competition). So you’ll want to test it first. How do you do that?

What most people do is show their designer samples to their friends or peers and ask “Which one do you like?”, or “What do you think about this one?”

The problem with this approach is that the question is asked out of context. The icon may look great, but compared to what?

A better approach would be to mix in your designer sample with some competing apps. Then ask your friends / relatives / peers “which of these apps would you want to use?”

No additional information is needed about what the apps are, what features they have or even what the names of the apps are. Just have them judge which app they would use based on the appearance of the icon. And definitely don’t tell them which icon is yours, since you don’t want any bias.

Do the test a few times until you see a consistent winner being picked out among different audiences. If the winner is your app, congratulations! If it’s not, then compare your icon to that of the winning app. What is it about that app icon that attracts users to it? Can you add those characteristics to your icon?

Keep doing the test until your icon is chosen as the winner. You may need to increase the audience size so that you have new people confirming whether any improvement has been made.

Over time, you’ll find yourself recognizing what the traits of good icons are. See if there are other areas in your app design that you can apply these traits to.

In the process of doing these tests, you may find that the results surprise you. Perhaps the winning icons weren’t the best looking ones. At the end of the day, it’s downloads and sales that count, so pick the design that converts the best, rather than the one that looks the best.

How to Get your App Noticed: Grab on to the Hype

Apple recently announced that there are now over a million apps in the app store. As an app developer, doesn’t that make it even more difficult for your app to get discovered? What can you do to get your app noticed?

The good news is that Apple actually helps you in this area by resetting the bar from time to time. The iPhone app store was launched in 2008. If you created an app in 2008, it was a LOT easier for your app to be noticed and discovered then, since there was much less competition. By April 2010 however, there were already 185 000 apps in the app store. How would you get noticed?

New Devices

That’s when the iPad was announced, and with it, the ability to create iPad specific apps. All those users of shiny, new iPads looked for iPad specific apps to take advantage of their device. Apple also separated the app store into iPhone and iPad sections, making it easier for iPad apps to get noticed. By the end of 2010, there were only 40 000 iPad specific apps, compared to 360 000 iPhone apps. So if you had come out with an iPad app then, your chances of being noticed would be much higher.

However there are now over 400 000 iPad specific apps out there. Maybe you missed the boat already. Fear not though, as other new devices may show up over the next few years that your app could support. Developers are usually given a few months of notice to prepare. Doing so can allow you to be one of the first apps that are released with a new device.

  • Apple TV: The big rumor is that Apple may one day open up support for apps that play on TV via the Apple TV.
  • iWatch: Will Apple release a smart watch that can talk to your phone?

New OS Features

Each summer, Apple hosts its World Wide Developer’s Conference in San Francisco. At that event, they usually introduce the next version of iOS, and all the new features that version brings. Depending on what your app is, you may be able to take advantage of some OS specific features. For example

  • iOS 5 saw the release of iCloud. You could now back up app data onto iCloud, which could then be synced onto multiple devices
  • iOS 6 saw the release of Passbook. You could create loyalty type coupons that showed on screen, when the user was near a key location.
  • iOS 7 saw a brand new visual design. You could redesign your app to better match the new design principles featured in iOS7

When a new OS is released, users want to get a feel for what’s new – so they are more likely to try out apps that take advantage of such features. Apple as well is more likely to feature apps that take advantage of new features or resources. In cases like the iOS7 visual redesign, apps that are not updated to take advantage of this are penalized by users for not being up to date.


iOS7

New Hardware Features

In some cases, when a new version of an existing device (iPhone or iPad) is announced, it includes new features that you as a developer can take advantage of. For example

  • iPhone 4: retina display
  • iPhone 5: taller display
  • iPhone 5s: 64 bit, M7 sensor chip

As more and more of these devices are sold, it is imperative that your app is updated to support them. Apps that are not optimized for the retina display and 4″ screen don’t look good or perform well on modern devices. Similarly, in a few years it might be expected that all apps are rewritten to take advantage of the 64 bit hardware that is made available.

New App Store Categories

kidsAs the app store becomes bigger, with more and more apps filling up each category, Apple opens up new categories to help users discover new apps. Keep an eye out for new categories that your apps might qualify for and resubmit your app to fit in the right category. This is a great way to get a leg up on competition that have not updated their apps accordingly.

Survival of the Fittest

Even though there are over a million apps on the app store, the vast majority are not updated regularly to take advantage of the above updates. By keeping your eye on the market and what is coming out, you can be prepared to be one of the first apps to take advantage of a new update, giving you valuable publicity that you couldn’t get otherwise.


Knowing When to Say No

Apple is famous for saying no to many features, even when competitors have it. And yet their products are spectacularly successful. Why is that?

More importantly, what are you saying no to in your apps? Are you trying to be all things to all people?

If you want raving fans who will share and help promote your app to others, then it’s important to only focus on them and their needs, even if it means saying no.

So how do we do that?

  1. Figure out your demographic and what problem it is of theirs that you are trying to solve.
  2. If a new feature or function does not appeal to this group, or solves a separate problem, then consider spinning off a separate app, rather than including it here.
  3. When adding new features, make sure they don’t overly add complexity to your app.
  4. If a feature will only be used by a small portion of your audience, is it worth it to include?

Where possible, you want to limit the choices your users have to make in your app, to what makes sense for them. If you offer too many choices, they will get confused as to what to click on.

By following this approach, even though you may limit your audience to a particular niche, you will

  1. Have a really focused app that does what it’s supposed to do really well
  2. Have a really easy to use app, that the user can figure out quickly
  3. Create raving fans who are happy that you took the time to solve their needs and not someone else’s
  4. Be able to better market this app to a select audience, rather than trying to compete with generic apps

This is the approach that Apple uses to get raving fans. See which aspects of it you can use in your own app development!

Image Credit


Eating your own Dogfood

Dogfooding

Image Credit.

Want to build a really great app? One that people love using and will tell their friends about? One that people will leave great reviews for? One that will leave users clamoring for more?

Here are the steps you can follow, to accomplish this.

1. Create an app that you yourself want to use.

Solve a problem that you have, that you haven’t found a solution for.

Being a target user yourself will help you a lot in the research phase of figuring out what problems there are that require a solution, and what people would be willing to pay for that solution. Would you be willing to pay for it yourself? Would you use this product regularly?

Be honest with your evaluation, since if this isn’t something you wouldn’t pay for or use, then it may be difficult to find others who would.

Eating your own dog food or just dogfooding is a common term used in the software industry, where software companies encourage (or require) employees to use their own products in order to find bugs, improve usability etc.

2. Use the app regularly and see if you’re happy with it.

If you’re not happy with it, refine it further until you’re happy with it as an end user (not just because it’s your app!). Decide early on if the reason you’re not using the product is something that an update would fix. You may decide in the end that your problem isn’t something that an app could solve, in which case it’s better to terminate the project early on (preferably even in the mockup stage). Or there may be technical challenges involved that cannot be overcome.

3. Attract other like-minded users to give you feedback.

Being a target user yourself, you are hopefully already engaged in communities with like minded individuals through forums, Facebook or Reddit groups. If so, see if you can sign on others to help you beta test or give feedback on whether they would use your product. Many people are genuinely happy to provide such feedback if the product will help them out in the future.

4. Continue improving and developing the app.

You’ll want to launch with the simplest version of your product (without any additional bells and whistles), so you can start receiving feedback right away. Since bells and whistles can eat up a budget pretty quickly, make sure that each feature you add really makes the product better and is closer to a must-have, rather than a would-be-nice-to-have.

5. Develop additional products and enhancements that you can sell to this same audience.


By following this process, and engaging in constant communication with your users, you should be able to develop a following that should make it easier to launch future products in a similar manner. Ideally, if later products you create also target the same audience, you can save yourself a lot in marketing costs, as you’ll already have an audience ready to sell your future product to.

I followed this exact process with my first product – Chinese Learn Online. I wasn’t satisfied with the other resources out there so I created my own, with myself being a target user. I created what I’d want to see in the perfect learning system out there.

Later, I became active in forums for learning Chinese, where I was able to promote and get feedback on my product. I developed a loyal following of users who suggested new features and gave me feedback on my implementation of them.

What started off as a small site for a few hundred users later blossomed into something much bigger, with thousands of paying users and millions of content downloads. But it all started with me creating something for myself.

A similar approach was later used with my STL Contact Manager app – I created a simple app to manage my contacts. After receiving additional feedback from users, more features were added, along with in-app purchases to further grow the product.

So what app have you always looked for but haven’t seen out there? Can you create a solution to your own problem?

How to Make Complex Apps on a Budget

When deciding how much you want to spend to build an app, it makes sense that the more features or more complicated an app is, the more your developer will charge to build it. What if there was a way to add complexity to your app, without having to pay an arm and a leg for it?

New markets have been created that allow you to purchase code segments or even full on apps that have the functionality you’re looking for. You can then cut and paste that code into your own app to use. Here are some of the options available to you:

Design Themes

Yes, design is important. But designers can be expensive. You can cut costs though by using pre-made designs.

The process functions as follows:

  1. Browse through the available templates.
  2. Choose a template that matches your app’s main focus (eg. business, social, maps).
  3. Purchase the design (Save 25% using this link)
  4. Send the template to your designer. He will then be able to change the colors and modify the theme files to match your brand identity.
  5. Send the final design files to your developer to implement.

Developer APIs

Google Maps iOS SDK

Many companies want you to use their services in their app. Want to make it easy for users to create an account? Integrate Facebook’s login API.
Want to use Google Maps instead of Apple Maps? Integrate Google’s Maps SDK.Want to let users save their data, so they can access it from another device? Integrate Dropbox’s SDK for iOS.

The list goes on.

Let bigger companies (with deep pockets) do the development work for you. You can reap the rewards in your own app by using their API.

Just be sure to read the fine print. Some apps set  API limits and may charge if you exceed that limit, while others may just shut you down. In either case, it is up to you to be aware.

Also be aware, that you may be required to update the APIs when new versions are released, which may require some additional effort on your part.

Code Segments

Pepper Style App UI
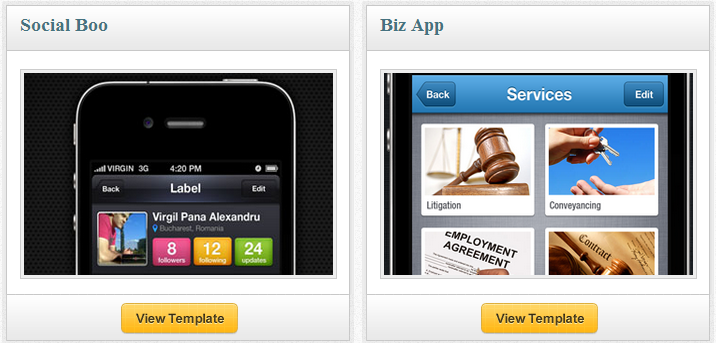
While Developer APIs do force you to rely on 3rd companies for support, another option is for you to purchase code segments that have been released for sale. Rather than having your developer build you functionality from scratch, you could just search for code segments that already did this for you. Here are examples of some of the code segments available:

Reskinning Apps

Of course you could take things a step forward. Instead of just purchasing code segments, what if you were to purchase entire apps? It would be much less effort to modify an existing app to do what you wanted to do (or rebrand it as something new) than to develop it from scratch.

Apptopia is a market place just for that – purchase an app for cheap that isn’t doing very well. Then see if you can modify it, repackage it and then sell and market it as your own.

Using one of the options above is a great way to save money when creating an app with complex functionality. It’s also a great way to test new features, by quickly being able to add them in, without having to spend much time on them. The small amounts of money spent purchasing some of these templates could pay itself back quickly, by immediately increasing the value your app provides to the end user.


How to Create an iPhone App Promo Video

A great way to market your app is to create a promo video or trailer that showcases your app. Users can be drawn in by a great icon, screenshots or description. But what can really put them over the edge is a video that highlights the different features of your app, and what makes it stand out.

A video is also essential for getting top review sites to review your app for you. In 30 seconds you can save reviewers and potential users a lot of time by showcasing key screens and features that would normally take much more time to discover. There are a few different approaches you can take for creating your video:

1. DIY

If you are on a budget, it is possible to create a basic video on your own. There are multiple ways to record your app and your interacting with it.

a. iOS Simulator

iPhoneSimulator

Use the iOS simulator provided by Apple to run your app on a Mac. Then use video screen capture software like Jing, Camtasia or other screen recorder tool to capture your interaction. You can also add effects like thumb presses to replace your mouse pointer using tools like Sim Finger.

Note that this approach won’t work for apps that require access to the camera or other device specific features that are not available in the simulator.

Image Credit

b. Airplay Mirroring

To get a better representation of your app running on your actual device, you could try mirroring your device (iPhone / iPad / iPod Touch) onto your TV, via an Apple TV, and then recording your video from TV.

A 3rd party solution that seems to work quite well is Reflector, which lets you mirror your device to a Mac / PC, where you can then  record the screen cast.

c. Recording your Device

The most direct way to record your app being used is to point a camera directly at your device, and record your app being used. If you use this approach, then pay attention to the following:

  1. Have a camera on a tripod, to keep the video stable.
  2. Place your device on a table or flat surface to keep it stable.
  3. Zoom your camera in to focus on the app to maximize the available viewing space.
  4. Be aware of your finger blocking the view, and only use it when necessary.

No matter which of the above approaches you use, after you have captured all the required video, you will need to do some editing. Here are some elements that you can consider:

  1. Unless it’s meant to be a tutorial video, keep it short and to the point. Teaser videos should be between 30 seconds to 1 minute long. If you want to record other elements of your app, then consider breaking them down into separate videos.
  2. Use a video editing program like iMovie to add a title and explanations or feature summaries of different screens, so the user understands what they are seeing.
  3. Edit out long loading screens to keep the video short and to the point.
  4. Add a catchy jingle to the background, to keep the video interesting.
  5. If you’re speaking in the video, consider recording the audio separately if the sound is not clear.

Here is a video that was done by an app developer himself, using the iPhone Simulator, screen cast software and iMovie to edit the final video.

2. Outsource Production

If you have a marketing budget, then you can get significantly better quality by hiring a professional to create your video.

How Much Does an iPhone Promo Video Cost?

Companies like apptamin can create promo videos for you for prices starting at $750. That would get you quality like this:

Obviously the bigger your budget, the higher end your promo video can look like. Increasing your budget to $2500 to $5000 would get you a video of this quality, which includes a professional voice-over:

In that same price range, you could also scout around your local area for a director who might be able to create a video like this, showing an actual user and the environment that you hope the app can be used in. This video here was created for $3750:

Once your video is completed, start posting it on your app site and social media platforms. Also post it to YouTube, Vimeo and other video platforms that can get your app increased exposure from search engines. Use it when posting your app on review sites. Also monitor the comments and feedback you get on the video from different channels to gauge the reaction from your potential audience.